PutDeviceToken
public BackendReturnObject PutDeviceToken(string deviceToken, isDevelopment isDev);
파라미터
| Value | Type | Description |
|---|---|---|
| isDev | isDevelopment | isDevelopment.iosDev(테스트 버전으로 사용하기 위한 값) 혹은 isDevelopment.iosProd(실제 배포용으로 사용하기 위한 값) |
설명
푸시 설정을 ON 합니다.
푸시 설정이 ON일 경우, 뒤끝 콘솔에서 푸시 기능을 사용할 시 푸시 알람이 옵니다.
푸시는 기본적으로 야간 푸시 수신 미동의로 설정되어 있습니다. 이를 변경하고자 할 경우에는 AgreeNightPushNotification 함수를 참고해주세요.
푸시 등록에 관해서는 ios 푸시 등록 가이드를 참고해 주세요.
isDevelopment가 iosProd일 경우, 프로비저닝 인증서를 통해 앱을 배포한 후 마켓에서 해당 앱을 다운로드해야지만 푸시 알람이 정상적으로 작동합니다.
디바이스 토큰 획득 방법
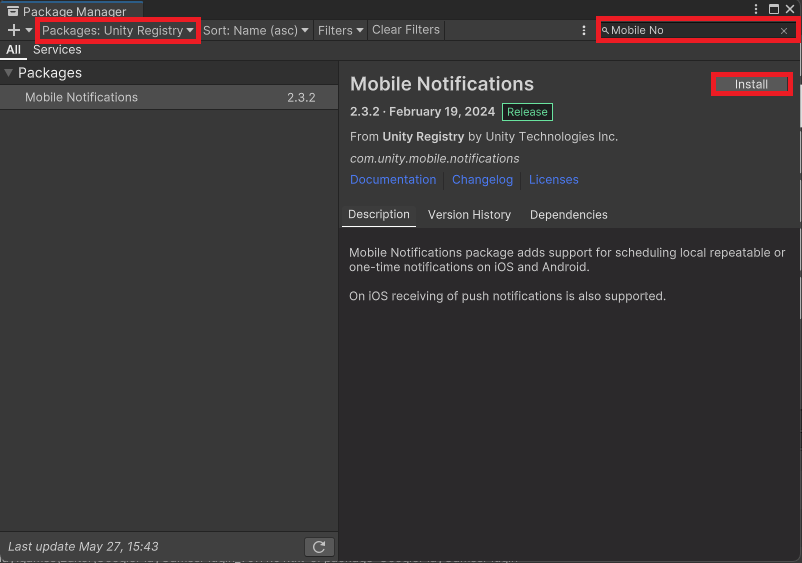
Package Manager에서 Mobile Notifications 설치
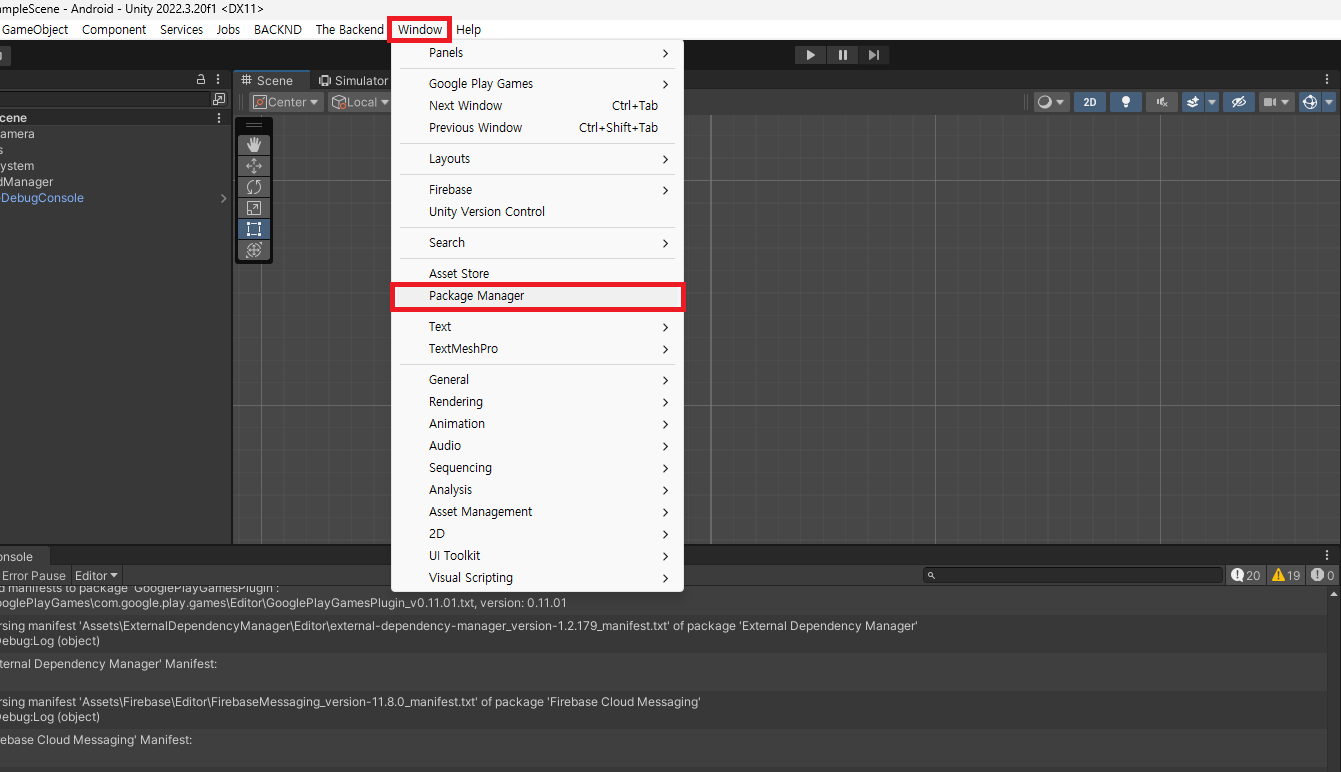
유니티 상단 Window > Package Manager를 클릭합니다.

Packages 카테고리를 Unity Registry로 바꿔주시고, Mobile Notifications를 검색합니다.
클릭 후, Install를 호출합니다.

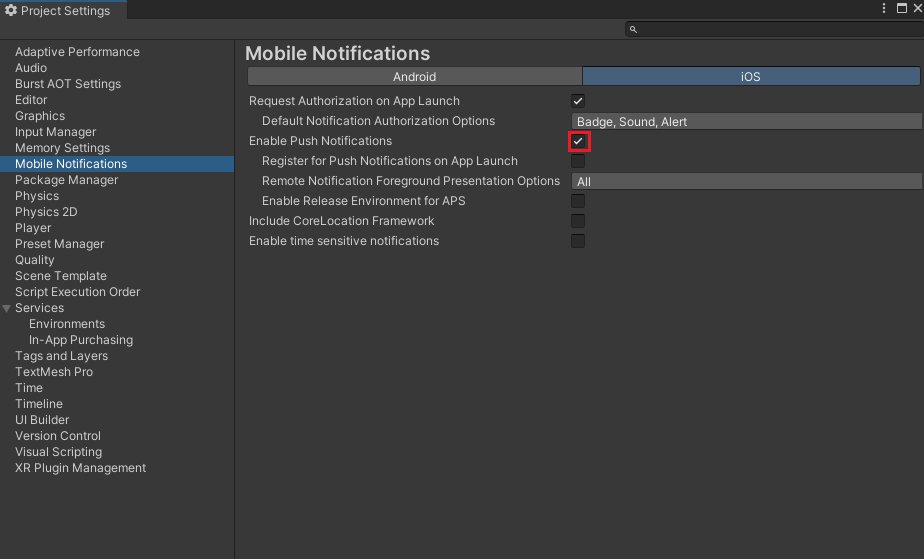
Mobile Notifications 설정
Project Settings > Mobile Notifications > iOS에서 Enable Push Notifications를 체크해줍니다.

디바이스 토큰 불러오기 코드 작성
using Unity.Notifications.iOS;

public class IOSPushFunction : MonoBehavior
{
    private string token = string.Empty;

    public void GetDeviceToken()
    {
        StartCoroutine(RequestAuthorization());
    }

    private IEnumerator RequestAuthorization()
    {
        var authorizationOption = AuthorizationOption.Alert | AuthorizationOption.Badge;

        using (var req = new AuthorizationRequest(authorizationOption, true))
        {
            while (!req.IsFinished)
            {
                yield return null;
            };

            token = req.DeviceToken;

            Debug.Log("IOS Push Token Created : " + token);
        }
    }
}
Example
동기
// token 값은 위 디바이스 토큰 획득 방법을 참고해주세요
Backend.iOS.PutDeviceToken(token, isDevelopment.iosDev);
비동기
// token 값은 위 디바이스 토큰 획득 방법을 참고해주세요
Backend.iOS.PutDeviceToken(token, isDevelopment.iosDev, (callback) =>
{
    // 이후 처리
});
SendQueue
// token 값은 위 디바이스 토큰 획득 방법을 참고해주세요
SendQueue.Enqueue(token, Backend.iOS.PutDeviceToken, isDevelopment.iosDev, (callback) =>
{
    // 이후 처리
});
ReturnCase
Success cases
등록에 성공한 경우
statusCode : 204
message : Success