Build & Deployment
Build
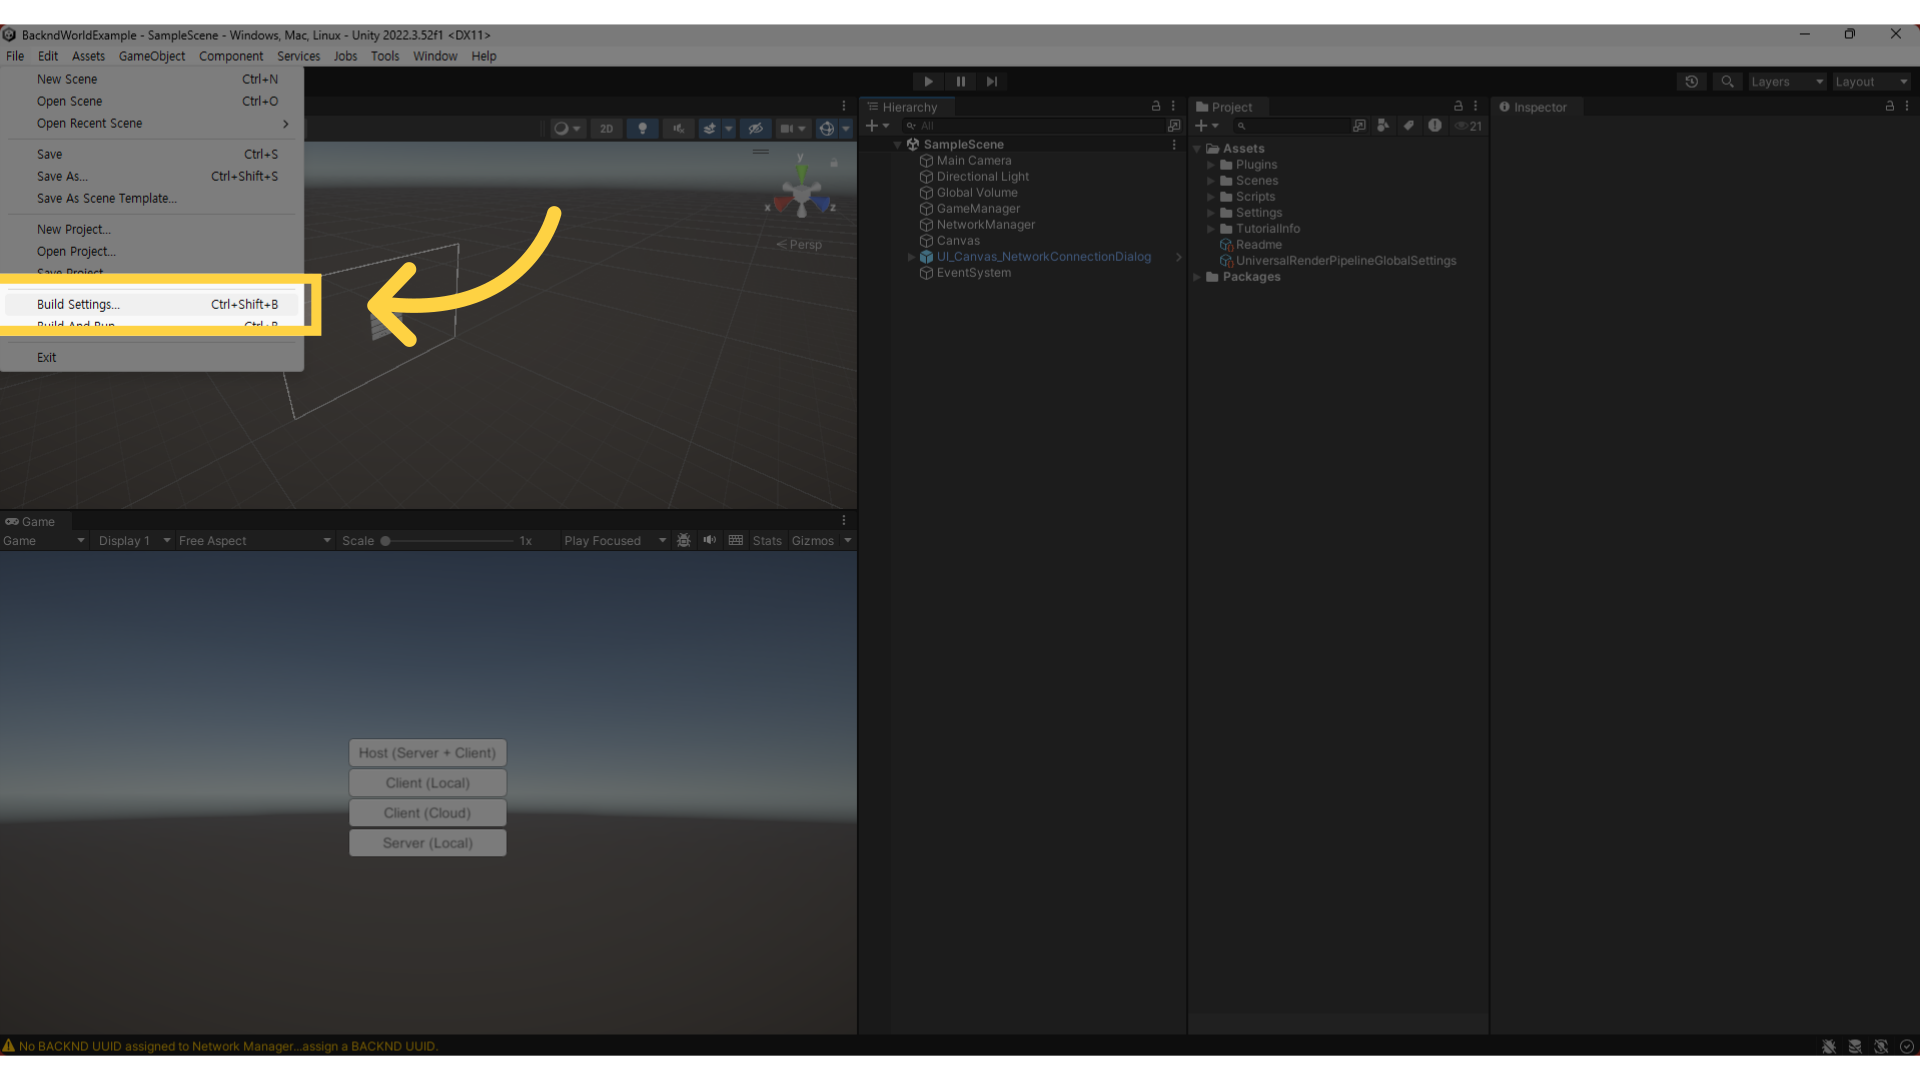
Unity Build Settings
Go to File > Build Settings in the Unity Editor.
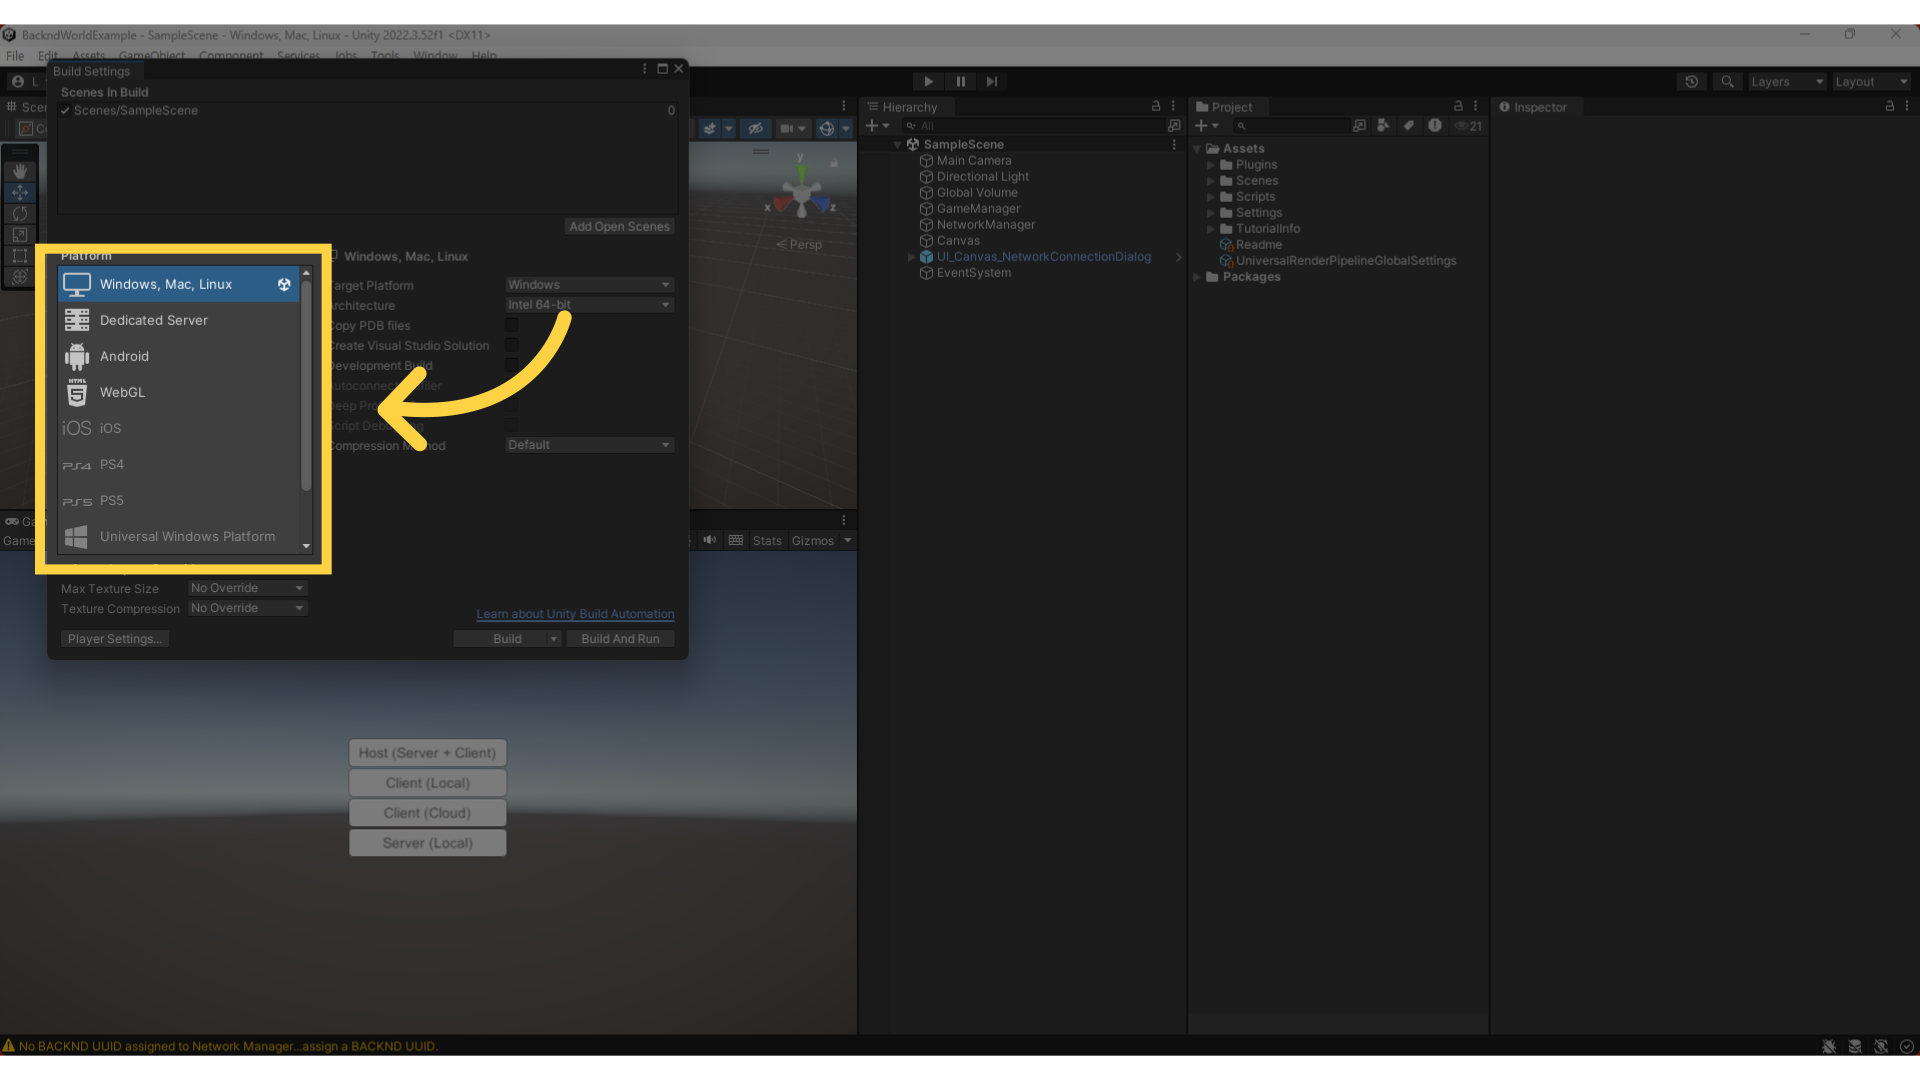
Select Dedicated Server under Platform.
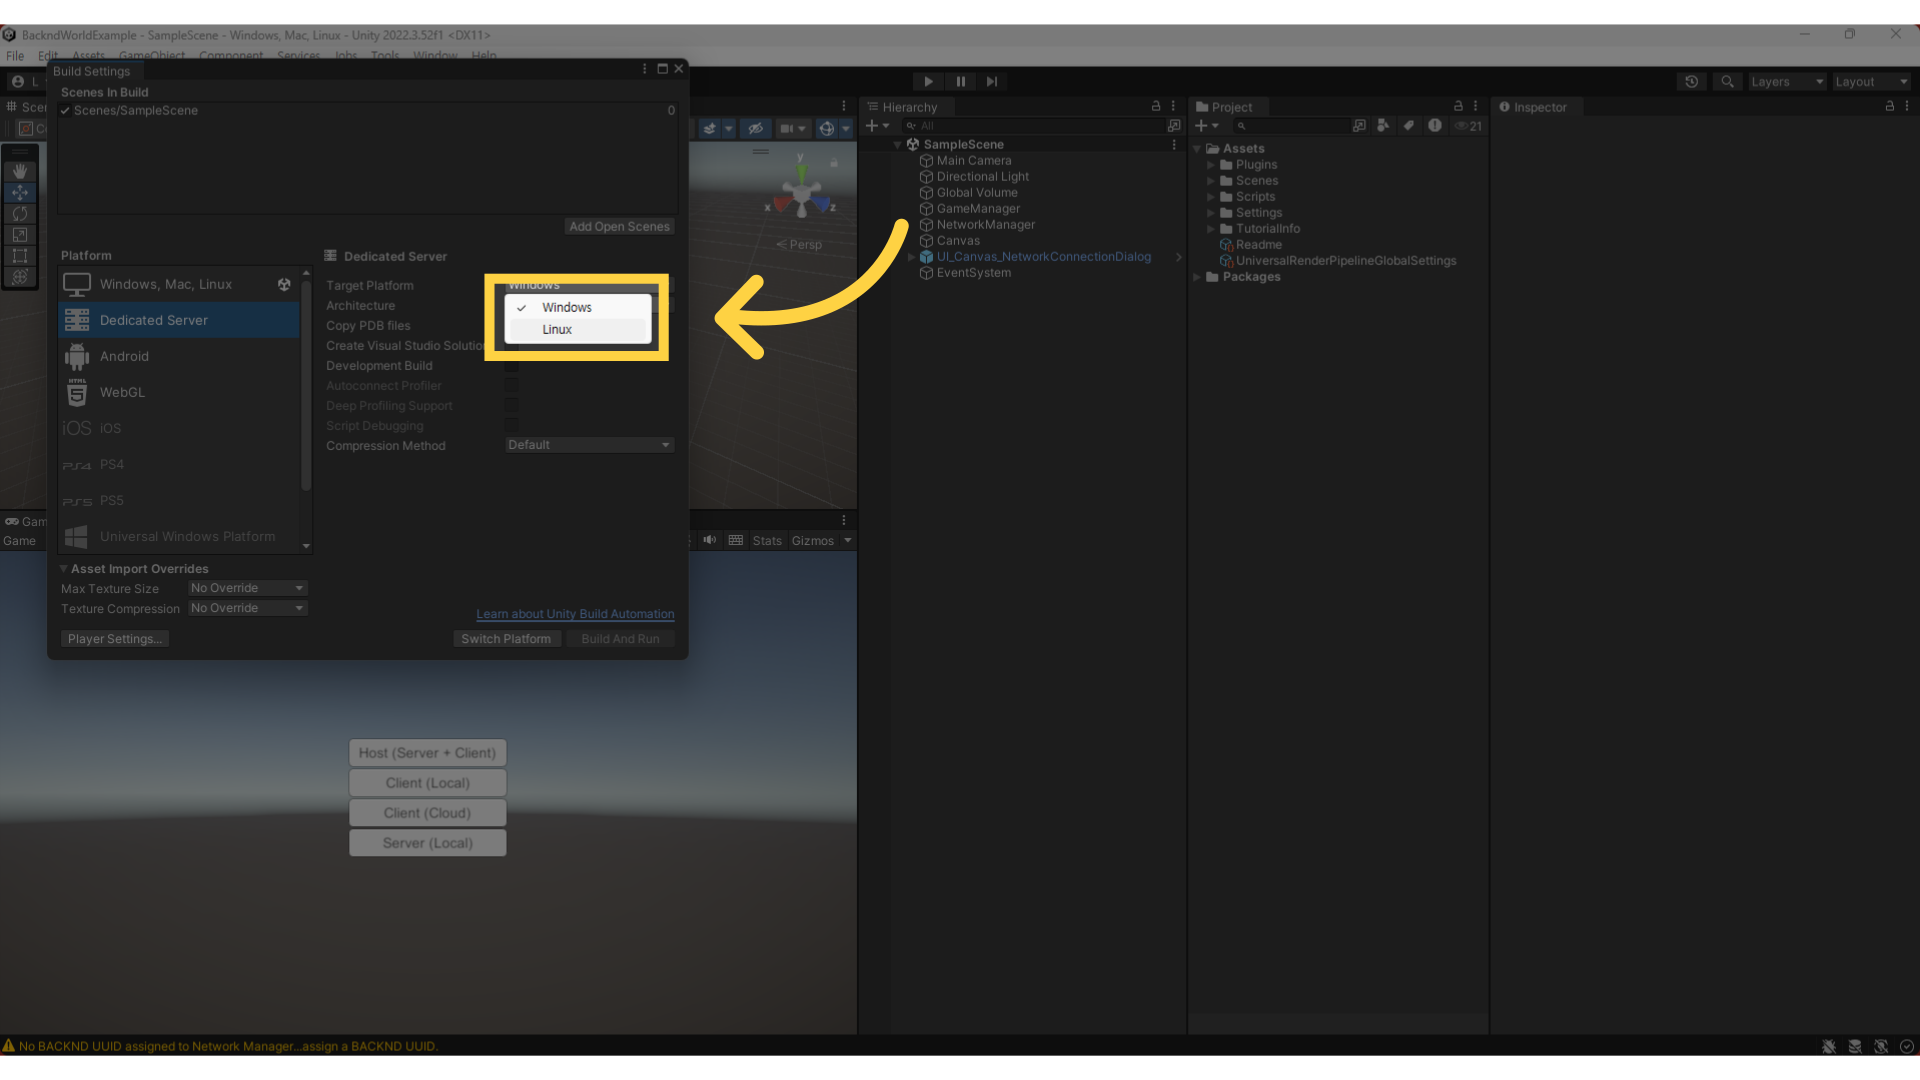
Choose Linux as the Target Platform.
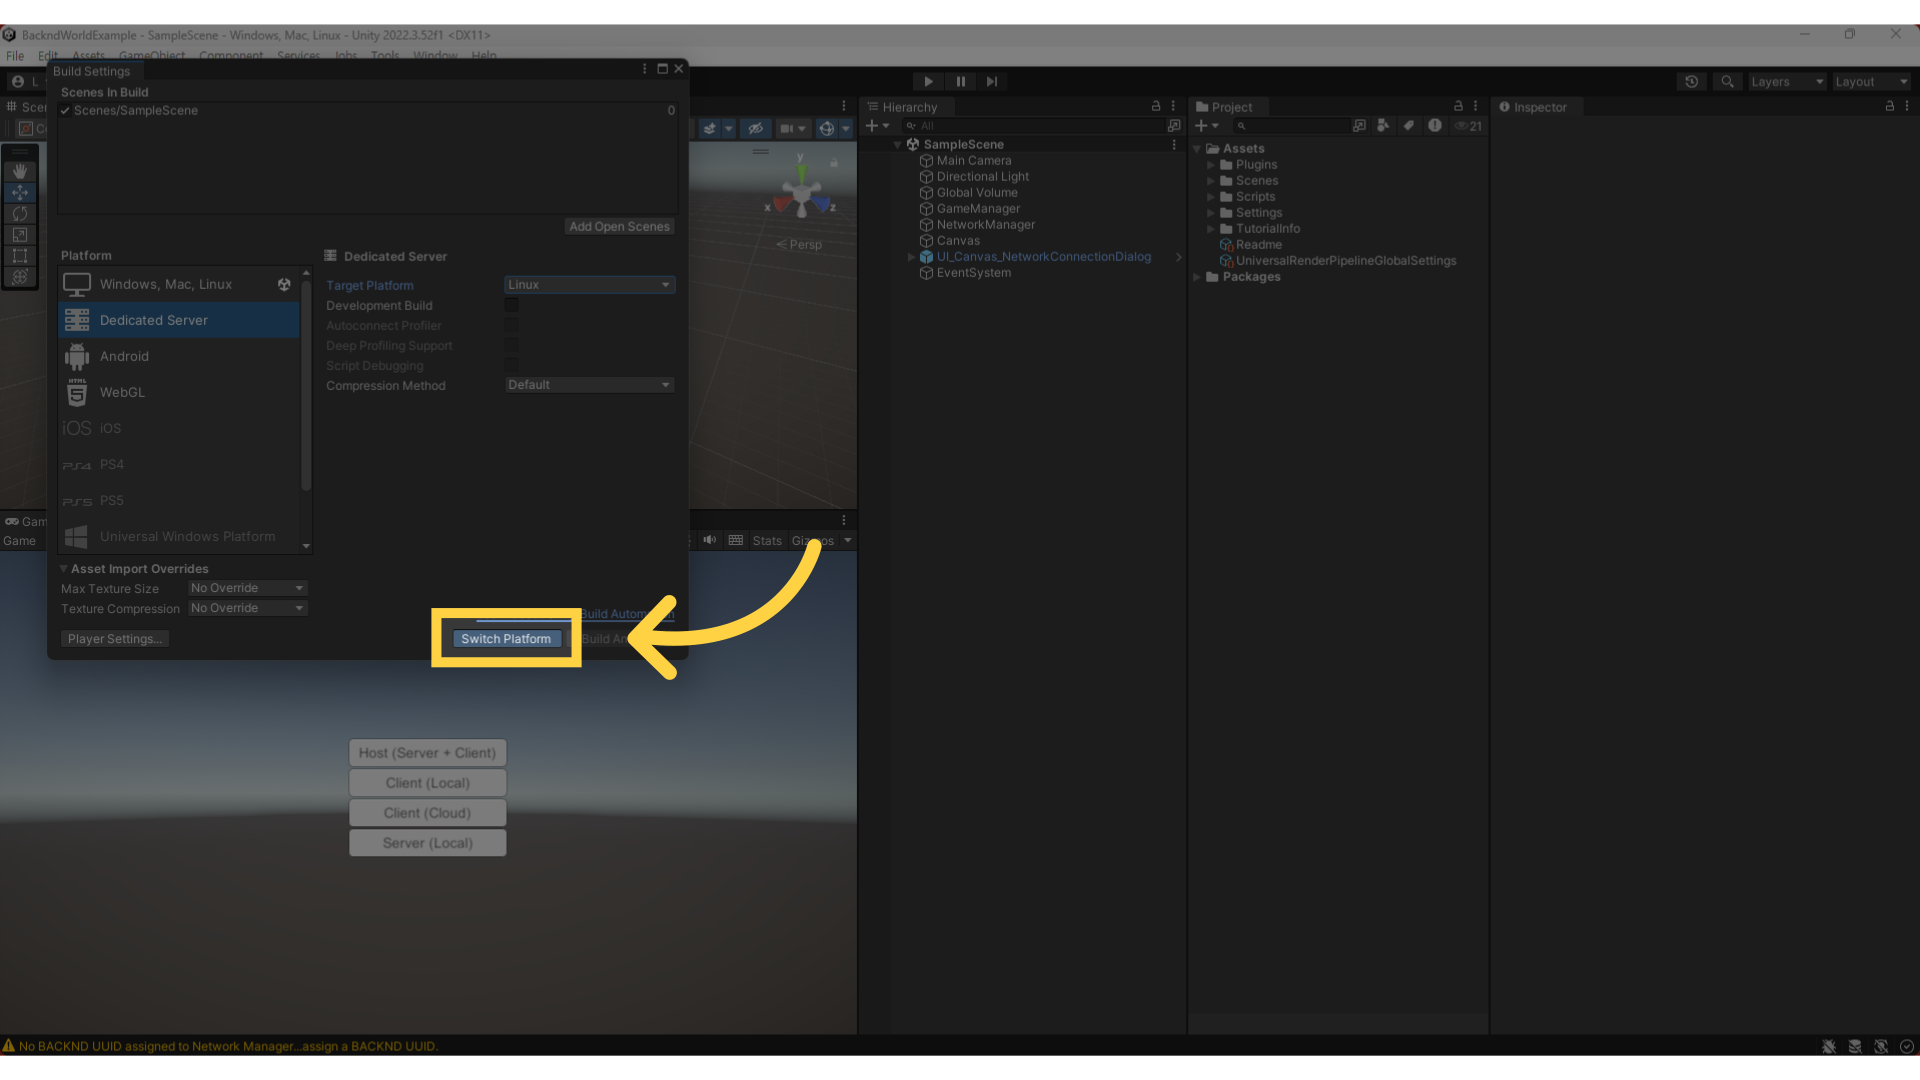
Click the Switch Platform button to switch the platform.
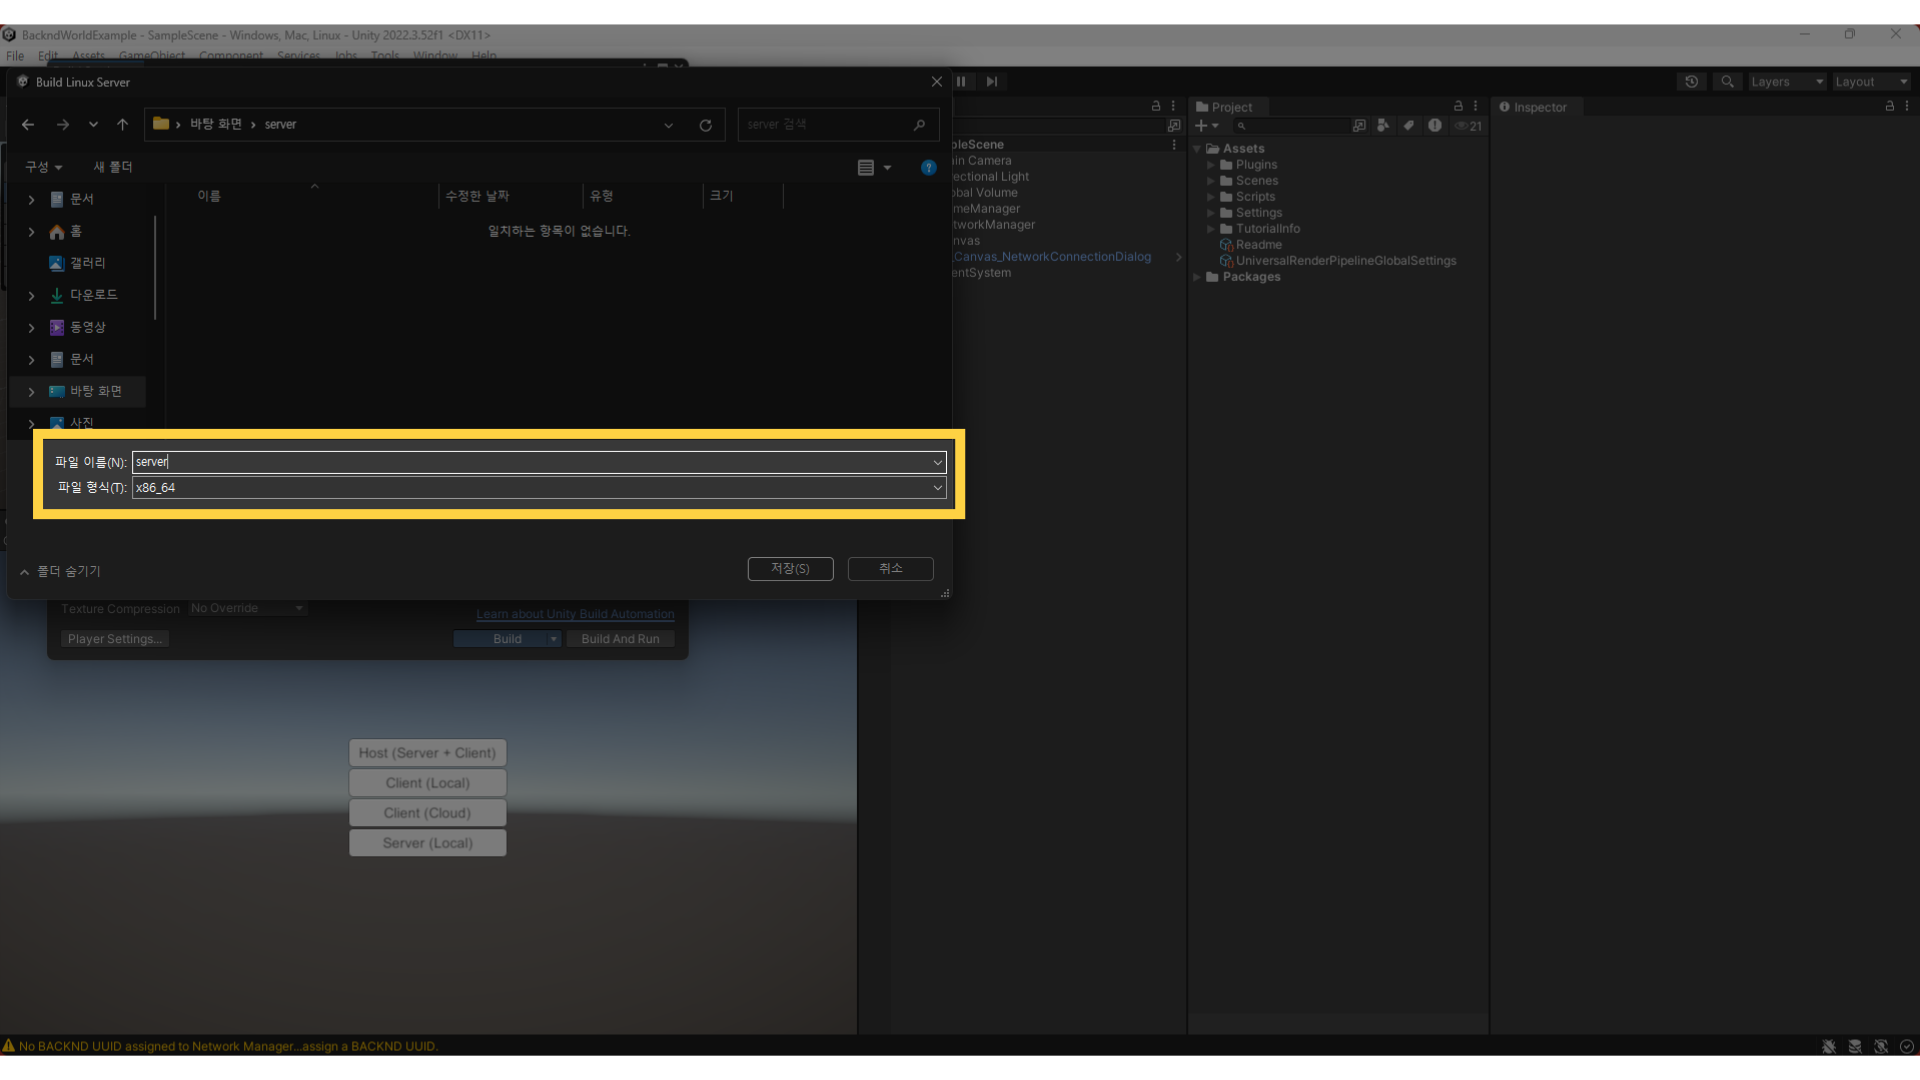
Click the Build button in the bottom-right corner.

Enter the name of the build file and select the save location.
Deployment
Preparing the Build Files
Navigate to the folder where the build is completed and select the parent folder of the generated files.
Compress the selected folder into a .zip or .gz format.
Server Upload
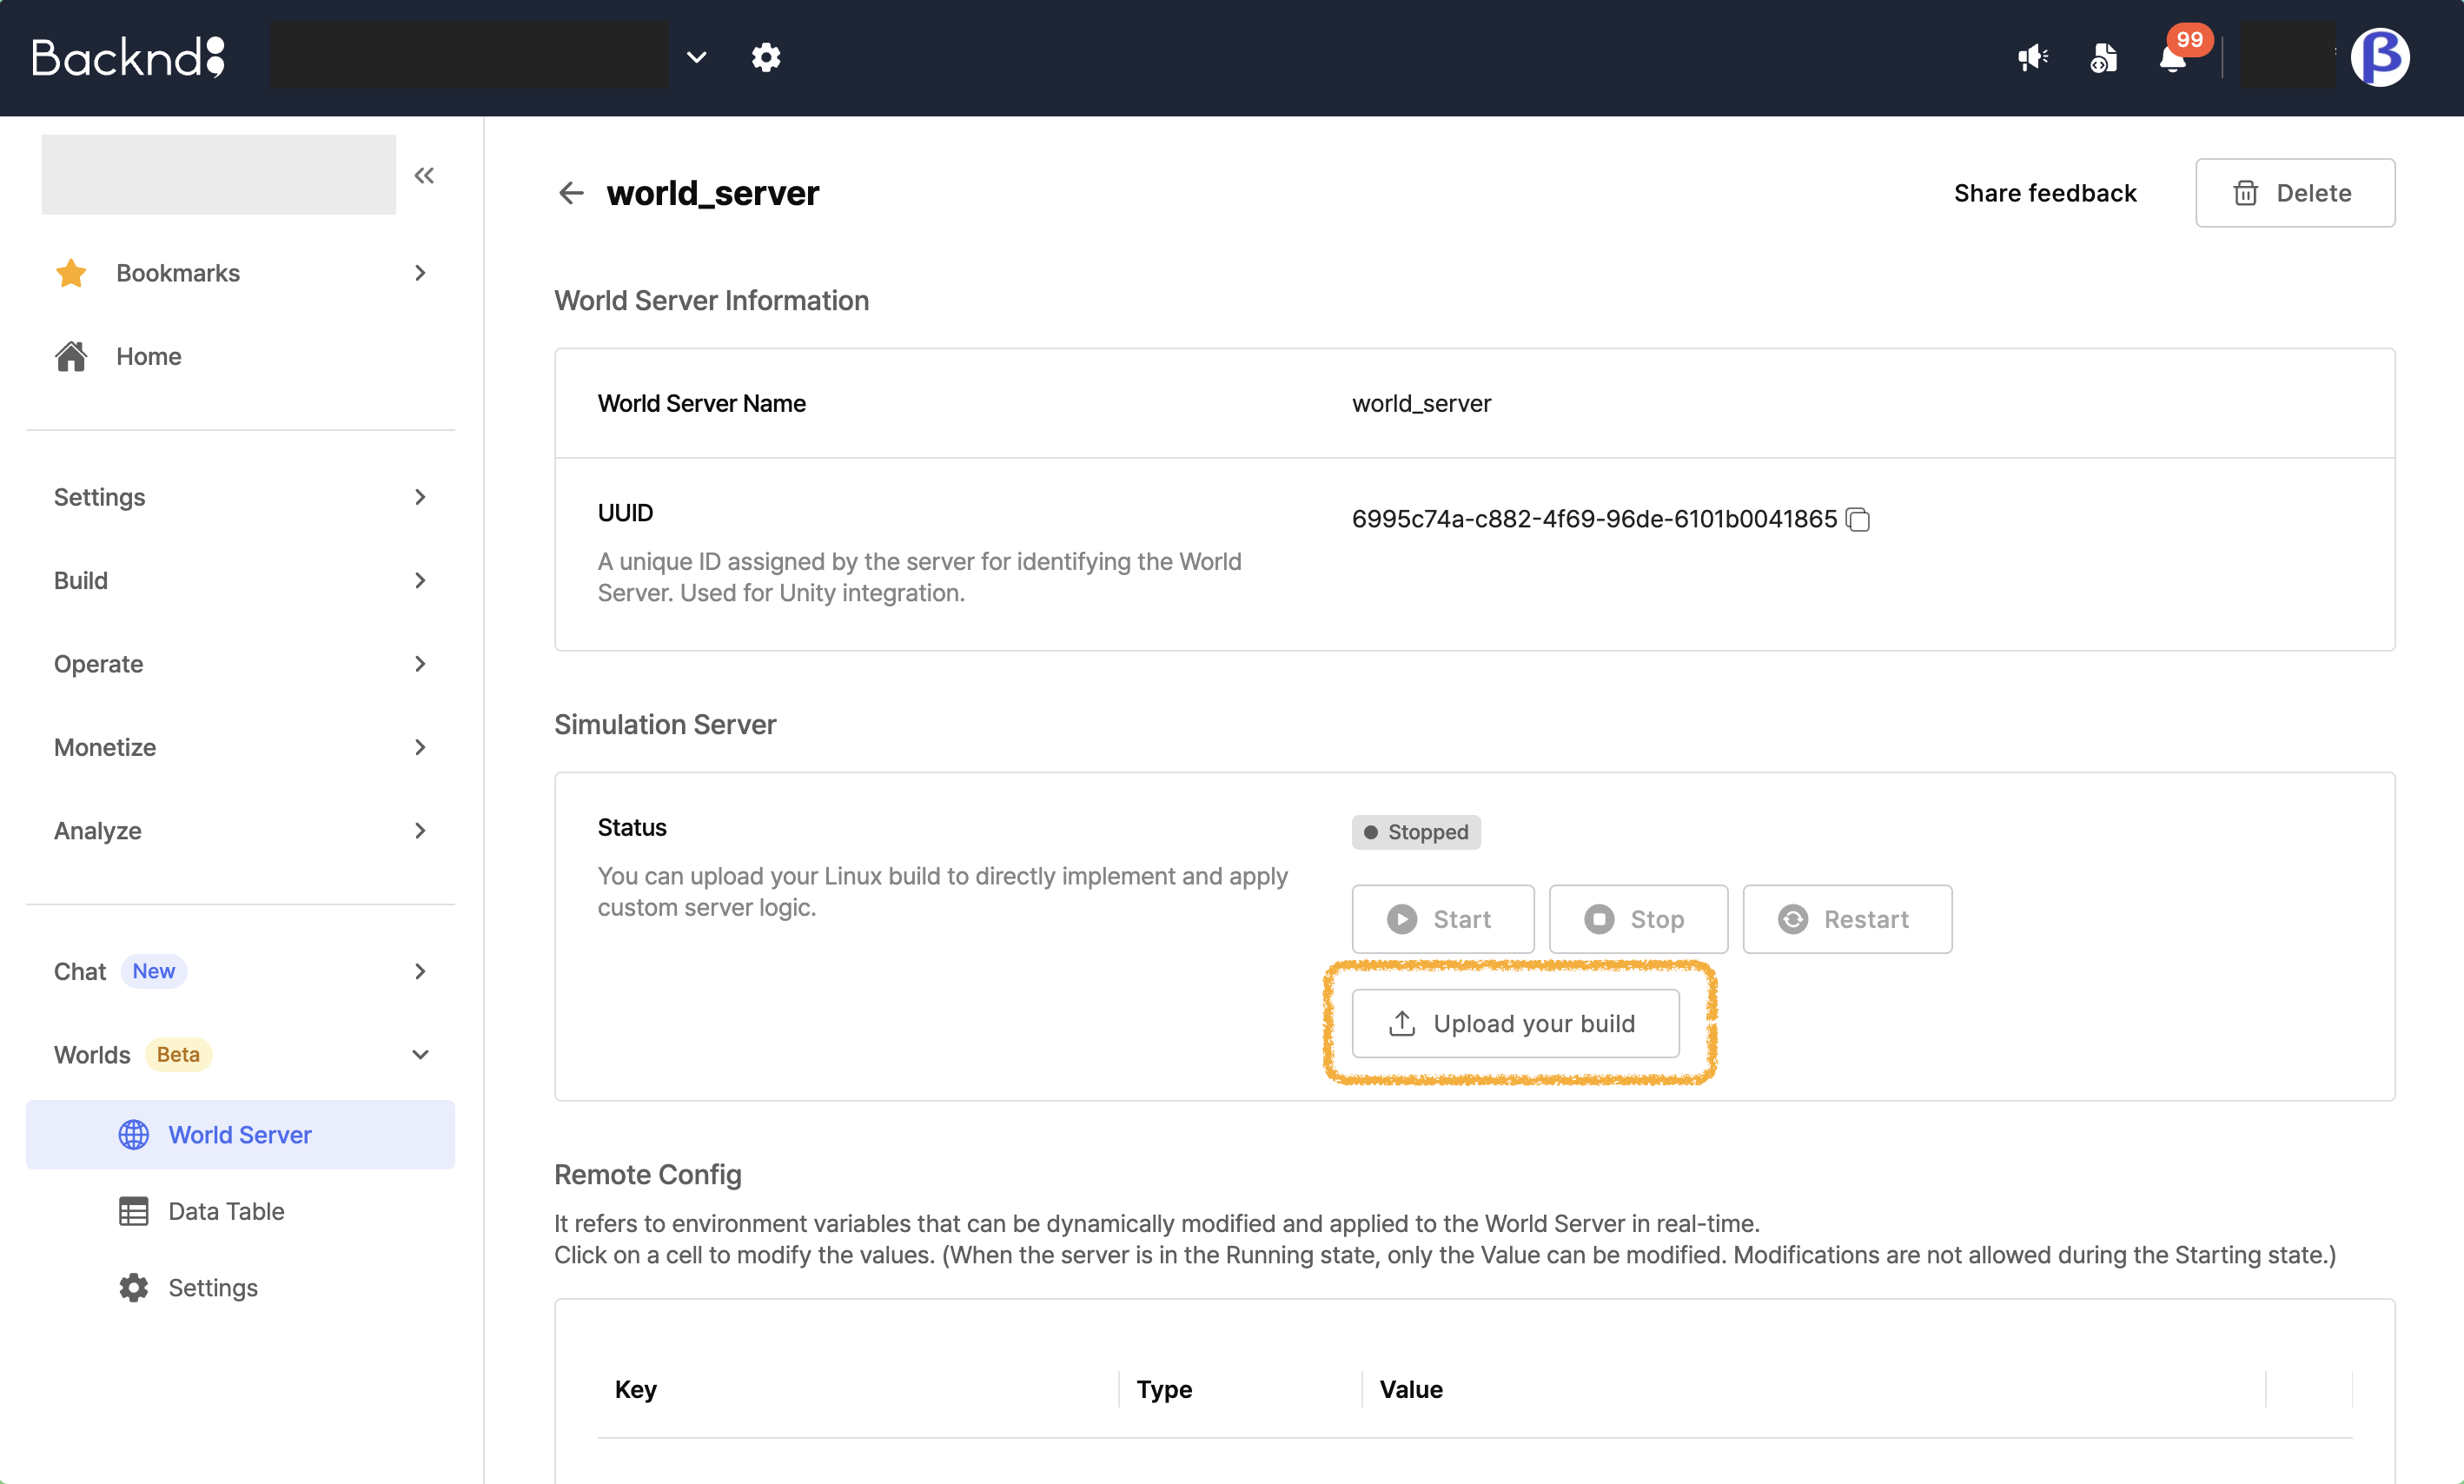
In the console page, click on World Server.
Select the world server that needs to be deployed from the list of world servers.
Click the Upload Build File button to upload the compressed build file.
Build File Requirements
Compression File Format
- Supported:
.zip,.gz - Not supported:
.rar,.7z, etc
File Name Rule
The compressed file name and the build file name must be the same.
✅ Correct example:
MyGame.zip
└── MyGame.x86_64
└── MyGame_Data/

❌ Incorrect example:
MyGame_v1.zip
└── MyGame.x86_64  // File name mismatch
File Structure
The executable file must be in the top-level directory.
✅ Correct structure:
MyGame.zip
├── MyGame.x86_64       // Top-level directory
├── MyGame_Data/
│   ├── Resources/
│   ├── Managed/
│   └── ...

❌ Incorrect structure:
MyGame.zip
├── Build/
│   └── MyGame.x86_64   // In subdirectory
└── MyGame_Data/
When uploading the build file, please ensure the following:
- The names of the compressed file and the executable file must match exactly.
- The executable file must be in the top-level directory.
- Only .zip or .gz formats are supported. :::