Getting Started
Follow these steps and start your BACKND SDK integration.
- Download latest BACKND SDK
- Install the downloaded SDK in Unity
- Apply BACKND credentials to a Unity Project
- Write a BACKND initialization script
- Test and done!
Step1. Download the BACKND SDK
Download the BACKND SDK below. BACKND Base SDK includes not only the base functionality but also the BACKND Match feature.
- Backend-5.16.0.unitypackage [2024-12-10]
When installing for the first time
- Go to Step2.
When upgrading the version
- When updating the SDK, the BACKND authentication values set in the Unity Backend Settings inspector may be reset. If the initialization does not work after updating the SDK, please check the authentication value on the Inspector window.
- When performing a version upgrade, make sure to check the Update Notes for the new SDK you want to upgrade to.
- If you have any issues with upgrading your version, please contact us at global@backnd.com and we'll get back to you as soon as possible.
Step2. Install the downloaded SDK in Unity
- Open the Unity Editor and activate the Project window. Drag and drop the downloaded BACKND SDK into the Project window. Alternatively, go to Unity Top Menu > Assets > Import Package > Custom Package, then select and import the BACKND SDK file.
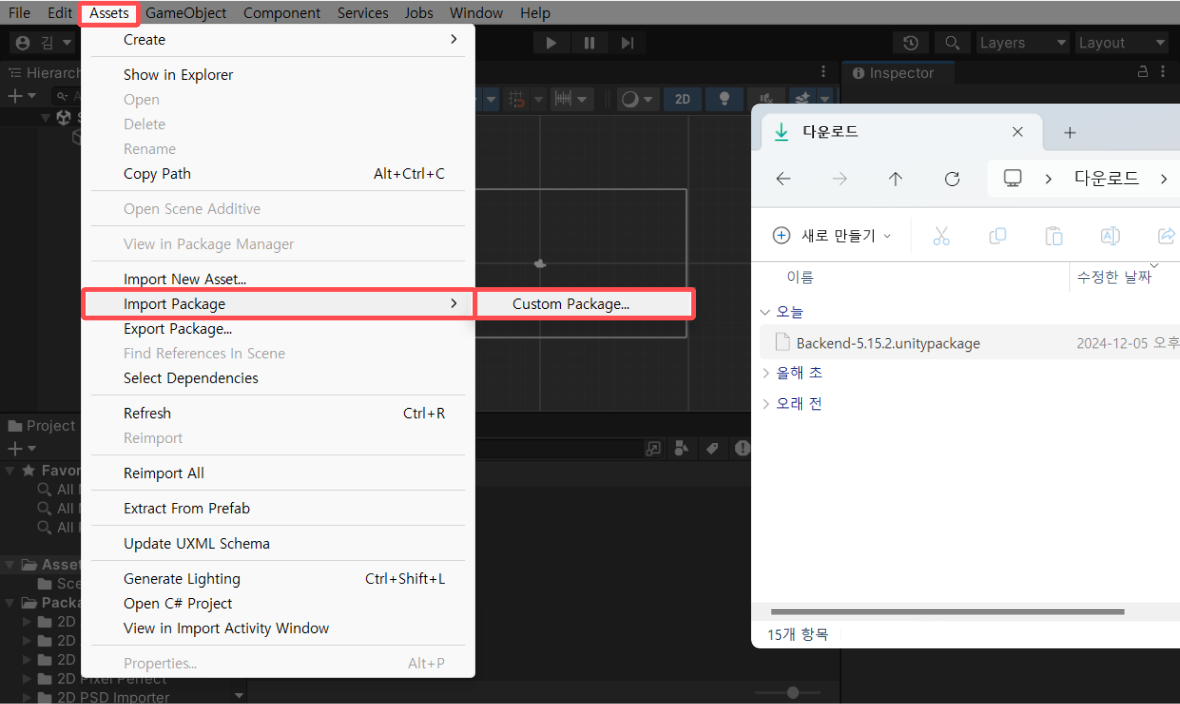
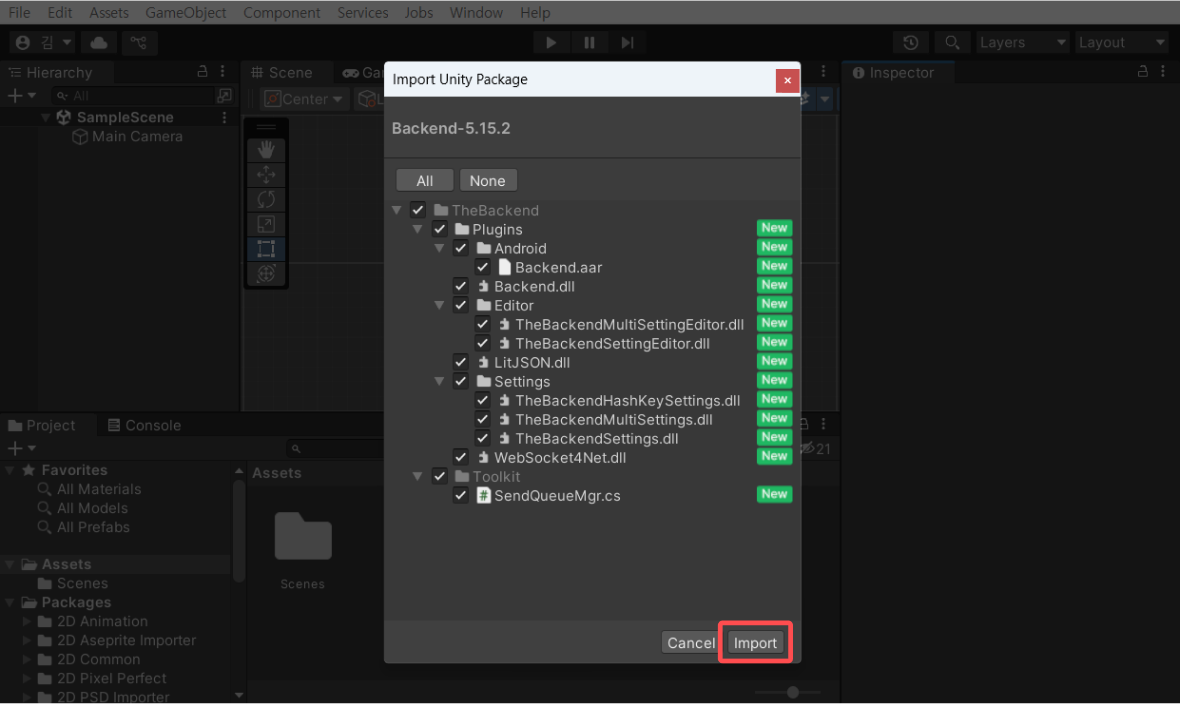
- in the import Unity Pakage window, check all the boxes and click the Import button.
- If the BACKND SDK is installed correctly, you will see
The Backendadded to the top menu in Unity.

Step3. Apply BACKND Credentials to Your Unity Project
- Issue the game authentication information from the BACKND console.\
The game authentication information consists of Client App Id and Signature Key, which are issued immediately upon creating a project in the console.\
You can check this information in the console under
Project Settings > Authentication Information.

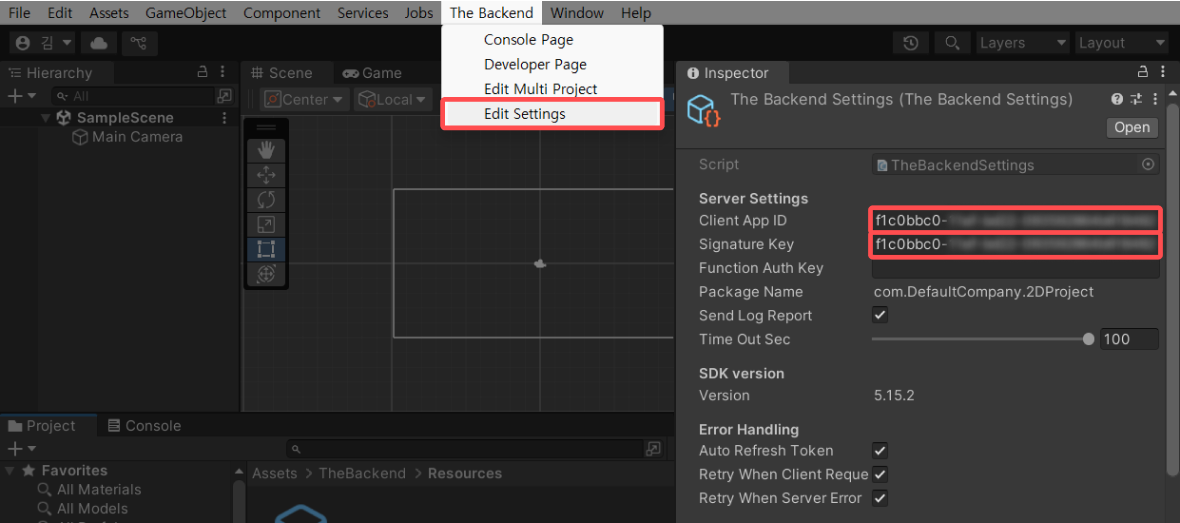
- Apply the issued authentication information to the Unity Inspector.
You can enable the Unity Inspector by clicking
Unity Top Menu > The Backend > Edit Settingsand paste the ClientApp Id and Signature Key copied from the BACKND console as shown below.
Step4. Write a BACKND initialization script
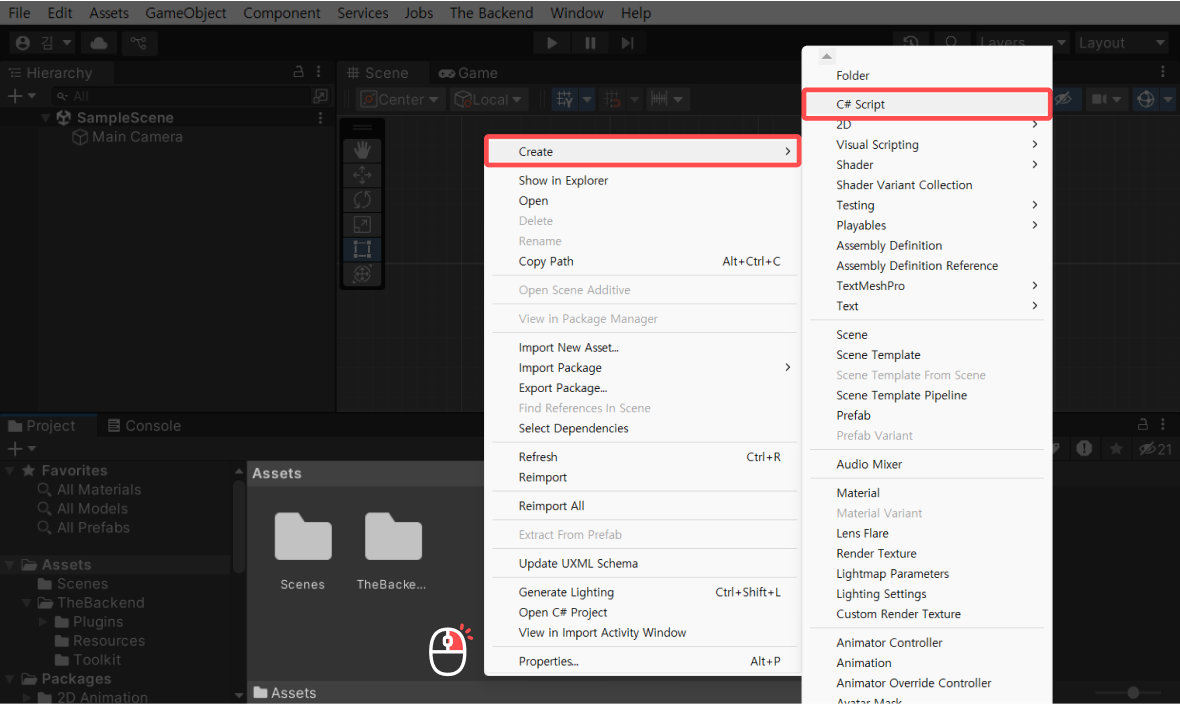
- Create a script. Right-click in the Unity Project window and select
Create > C# Scriptto create a new script.
- Right-click the created script, select Rename, and change the name the name of your choice. It this documentation, the script will be renamed to BackendManager.
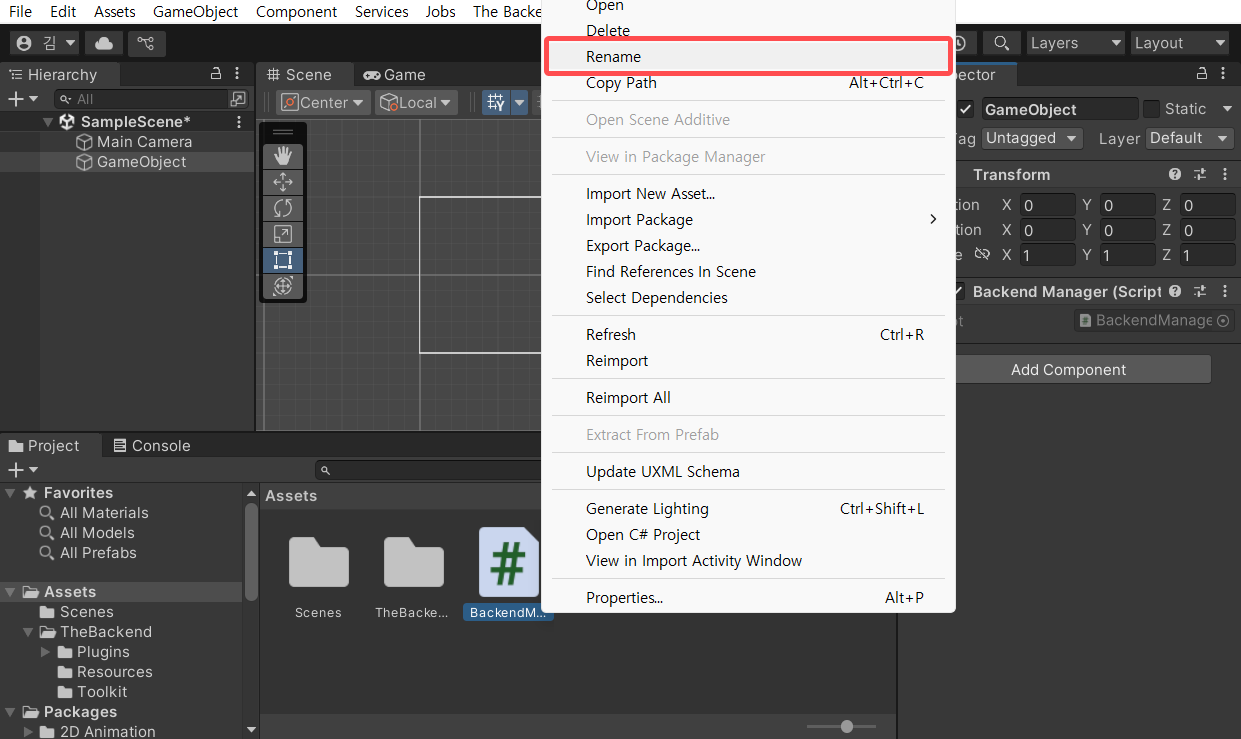
- Double-click the renamed script to open the script editor.
TIP! If the script editor does not open, please check!
Go to Unity top menu > Edit > Preferences to activate the window. Then, configure the External Script Editor in the External Tools tab.
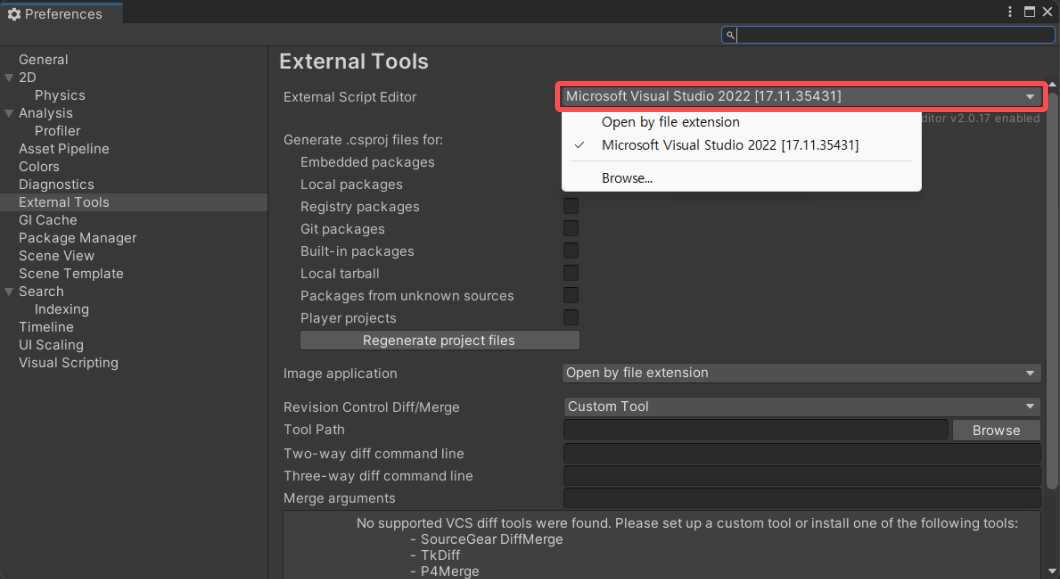
- Write the BACKND initialization script. The default initial script(template) is shown below. Replace it by copying and pasting the script into your code.
Initial Script
using System.Collections;
using System.Collections.Generic;
using UnityEngine;

public class BackendManager : MonoBehaviour
{
    // Start is called before the first frame update
    void Start()
    {

    }

    // Update is called once per frame
    void Update()
    {

    }
}
BACKND initailzation Script
using System.Collections;
using System.Collections.Generic;
using UnityEngine;

// Adds BACKND SDK namespace
using BackEnd;

public class BackendManager : MonoBehaviour {
    void Start() {
        var bro = Backend.Initialize(); // Initialize BACKND

        // Response value for BACKND initialization
        if(bro.IsSuccess()) {
            Debug.Log("Initialization successful : " + bro); // If successful, statusCode 204 Success
        } else {
            Debug.LogError("Initialization failed : " + bro); // If failed, a 4xx statusCode error occurs
        }
    }
}
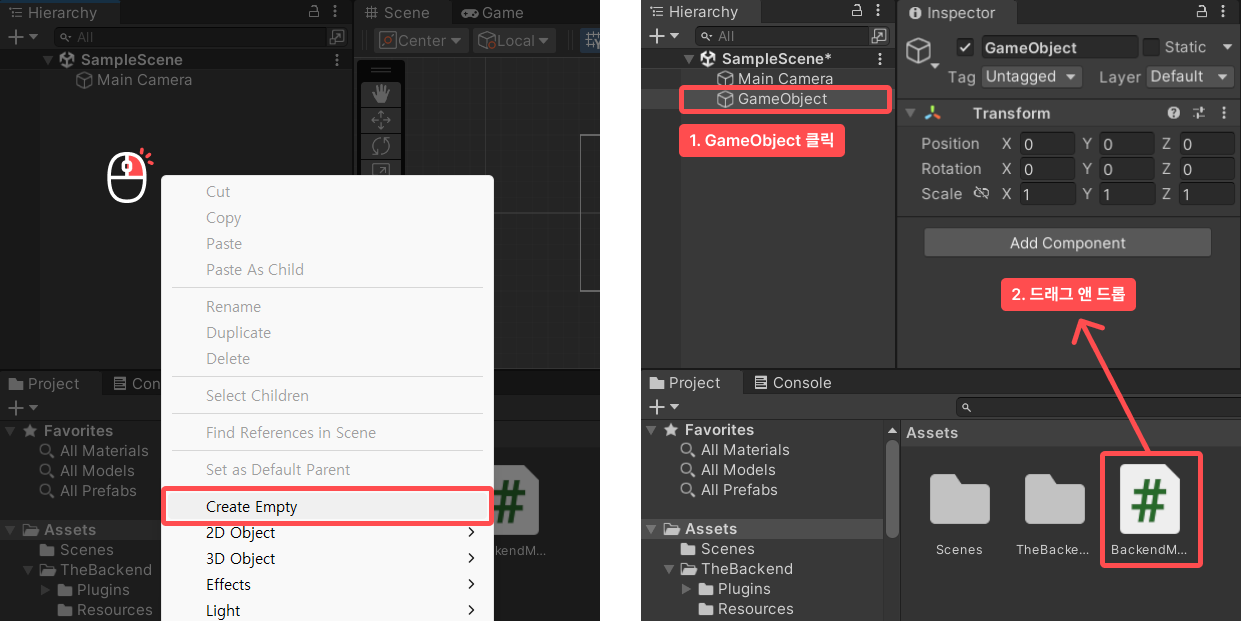
- Create a GameObject and attach the script you wrote to it.
To create a GameObject, right-click in the Unity Hierarchy window and select
Create Empty. 이Then click on the created GameObject, and drag and drop the BACKND Initialization Script into the Inspector pointing to the GameObject.
Example of script attached to Inspector
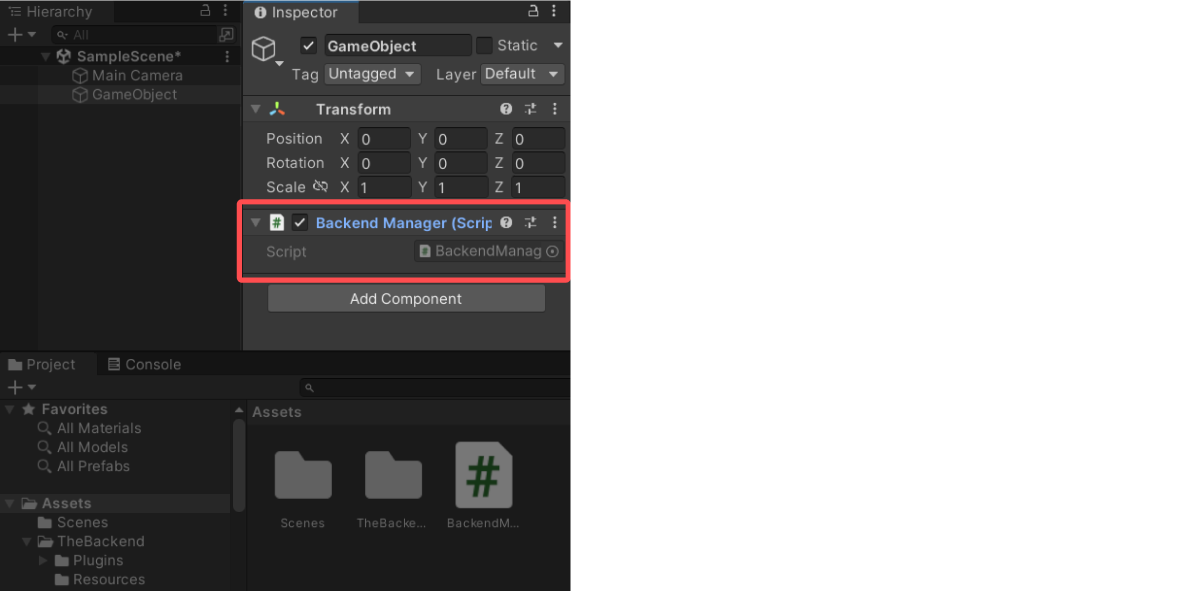
- All preparations for initialization are now complete.
Step5. Test complete!
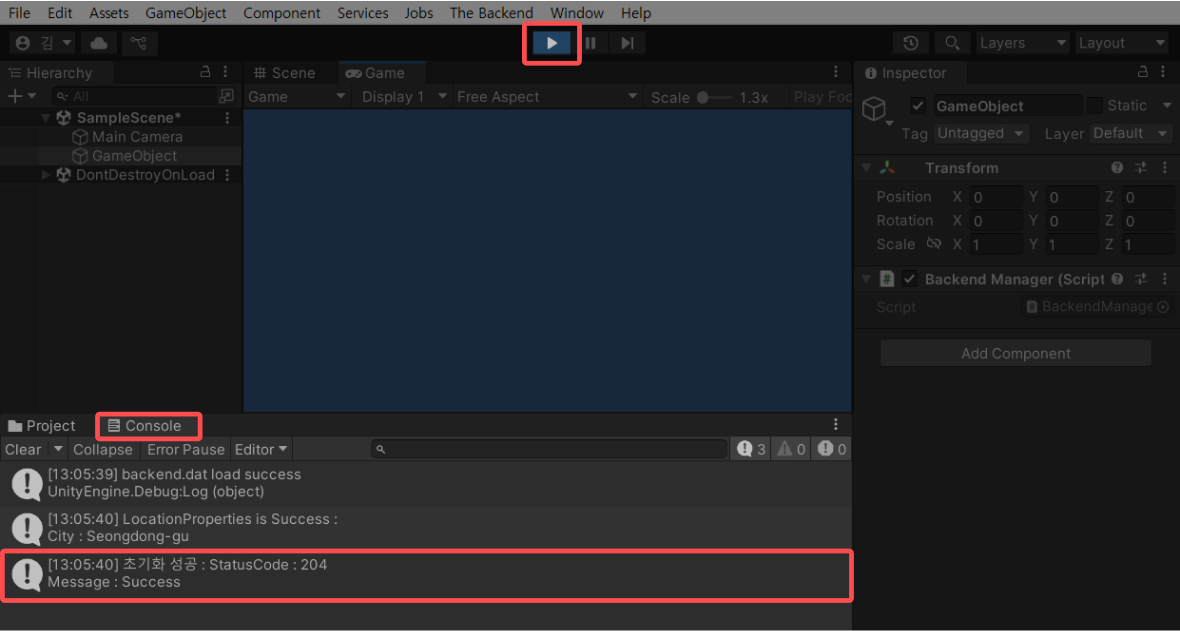
- Perform the test. Click the Play button (▶) at the top center of Unity. Then, check the Unity Console window for the initialization success message.
If you see the log that reads
Initialization successful: statusCode : 204, it means the setup is complete.
- Now, all BACKND features can be used normally!
Have you completed the initialization?
If you're having trouble choosing which features of Backend to implement first, you can follow the Guidelines. It lists the basic features that must be implemented to use the backend (signup, login), as well as the core features implemented in many games.